Ford Explorer: Rear Climate Control / Removal and Installation - Rear Climate Control Housing
Ford Explorer 2020-2026 Service Manual / Electrical / Climate Control System / Rear Climate Control / Removal and Installation - Rear Climate Control Housing
Removal
NOTICE: During the removal or installation of components, cap, tape or otherwise appropriately protect all openings and tubes/fittings to prevent the ingress of dirt or other contamination. Remove caps, tape and other protective materials prior to installation.
NOTE: Removal steps in this procedure may contain installation details.
-
Recover the refrigerant. Refer to the appropriate Recovery procedure in Group 412.
-
Drain the cooling system.
Refer to: Engine Cooling System Draining, Vacuum Filling and Bleeding (303-03A Engine Cooling - 2.3L EcoBoost (201kW/273PS), General Procedures).
Refer to: Engine Cooling System Draining, Vacuum Filling and Bleeding (303-03B Engine Cooling - 3.0L EcoBoost, General Procedures).
Refer to: Engine Cooling System Draining, Vacuum Filling and Bleeding (303-03C Engine Cooling - 3.3L Duratec-V6, General Procedures).
-
Remove the RHR wheel and tire.
Refer to: Wheel and Tire (204-04A Wheels and Tires, Removal and Installation).
-
Remove the retainers and position aside RHR wheel splashshield.
.jpg) |
-
-
Release the clamps, disconnect the rear heater inlet and outlet lines.
-
Remove the rear evaporator inlet and outlet line nuts and disconnect the fitting.
-
Make sure to cover any open ports to prevent debris from entering the system.
Torque: 133 lb.in (15 Nm)
-
Release the clamps, disconnect the rear heater inlet and outlet lines.
.jpg) |
-
Remove the floorpan bracket nuts.
Torque: 80 lb.in (9 Nm)
.jpg) |
-
Remove the RH loadspace trim panel.
Refer to: Loadspace Trim Panel (501-05 Interior Trim and Ornamentation, Removal and Installation).
-
-
Detach the rear floor duct.
-
Detach the roof line duct.
-
Disconnect the rear climate control housing electrical connectors.
-
Detach the wiring harness routing clips.
-
Remove the retainers and remove the rear climate control housing.
Torque: 80 lb.in (9 Nm)
-
Detach the rear floor duct.
.jpg) |
Installation
-
To install, reverse the removal procedure.
-
NOTICE: Only use the specified material to lubricate the seals.
Install and lubricate new O-ring seals. Refer to the appropriate Specifications in Group 412.
-
Fill and bleed the cooling system.
Refer to: Engine Cooling System Draining, Vacuum Filling and Bleeding (303-03A Engine Cooling - 2.3L EcoBoost (201kW/273PS), General Procedures).
Refer to: Engine Cooling System Draining, Vacuum Filling and Bleeding (303-03B Engine Cooling - 3.0L EcoBoost, General Procedures).
Refer to: Engine Cooling System Draining, Vacuum Filling and Bleeding (303-03C Engine Cooling - 3.3L Duratec-V6, General Procedures).
-
Lubricate the refrigerant system with the correct amount
of clean refrgerant oil. Refer to the appropriate Refrigerant Oil
Adding procedure in Group 412.
 Removal and Installation - Rear Blower Motor Speed Control
Removal
NOTE:
Removal steps in this procedure may contain installation details.
Remove the RH loadspace trim panel.
Refer to: Loadspace Trim Panel (501-05 Interior Trim and Ornamentatio..
 Removal and Installation - Rear Evaporator
Removal
NOTE:
The rear evaporator is available only as part of the rear climate control housing.
Remove the rear climate control housing.
Refer to: Rear Climate Control Housing (412-02 Re..
Other information:
Ford Explorer 2020-2026 Owners Manual: USING DRIVER ALERT
Switching the System On and Off Switch the system on or off using the touchscreen. See Settings. When active, the system monitors your alertness level based upon your driving behavior in relation to the lane markings, and other factors. System Warnings Note: The system does not issue warnings below approximately 40 mph (64 km/h)...
Ford Explorer 2020-2026 Owners Manual: Entertainment
A Audio source. Select to choose a different audio source. B Presets. Swipe left to view more presets. You can access these options using the touchscreen or voice commands. Sources Press this button to select the source of media you want to listen to...
Categories
- Manuals Home
- 6th Generation Explorer Owners Manual
- 6th Generation Explorer Service Manual
- Interior Trim and Ornamentation
- Removal and Installation - All-Wheel Drive (AWD) Module
- General Procedures - Rear Camber Adjustment
- New on site
- Most important about car
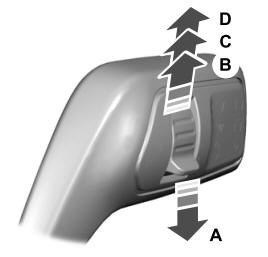
Windshield Wipers
 Push the lever up or down to operate
the windshield wipers.

A - Single wipe.
Copyright © 2026 www.foexplorer.com
