Ford Explorer: Transfer Case / Removal and Installation - Transfer Case Front Output Shaft Seal
Ford Explorer 2020-2026 Service Manual / Powertrain / Automatic Transmission / Transfer Case / Removal and Installation - Transfer Case Front Output Shaft Seal
Special Tool(s) / General Equipment
.jpg) |
205-1018 Installation Tube |
.jpg) |
205-1067 Installer, Output Shaft AWD |
Removal
-
With the vehicle in NEUTRAL, position it on a hoist.
Refer to: Jacking and Lifting - Overview (100-02 Jacking and Lifting, Description and Operation).
-
Remove the transfer case.
-
Remove the transfer case output shaft seal cover.
.jpg) |
-
Remove and discard the transfer case output shaft seal.
.jpg) |
Installation
-
NOTE: Apply petroleum jelly to the outer circumference of the oil seal.
Use Special Service Tool: 205-1067 Installer, Output Shaft AWD. , 205-1018 Installation Tube.
.jpg) |
-
Install the transfer case.
 General Procedures - Transfer Case Draining and Filling
Draining
With the vehicle in NEUTRAL, position it on a hoist.
Refer to: Jacking and Lifting - Overview (100-02 Jacking and Lifting, Description and Operation)...
 Removal and Installation - Transfer Case Input Shaft Seal
Special Tool(s) /
General Equipment
205-1018Installation Tube
308-943Installer, Input Seal
Removal
With the vehicle in NEUTRAL, position it on a hoist...
Other information:
Ford Explorer 2020-2026 Service Manual: Removal and Installation - Second Row Easy Entry Manual Release Cable
Removal NOTE: LH rear seat shown, RH rear seat similar. NOTE: Removal steps in this procedure may include installation details. NOTE: Follow the unique instructions or graphic for this step in the installation. Remove the second row single seat backrest cover...
Ford Explorer 2020-2026 Owners Manual: Child Safety Locks
When these locks are set, you cannot open the rear doors from the inside. A child safety lock is on the rear edge of each rear door. You must set the child safety lock separately on each door. Left-Hand Side Turn the key clockwise to switch the child lock on and counter clockwise to switch it off...
Categories
- Manuals Home
- 6th Generation Explorer Owners Manual
- 6th Generation Explorer Service Manual
- Engine
- Traction Control
- General Procedures - Transmission Fluid Drain and Refill
- New on site
- Most important about car
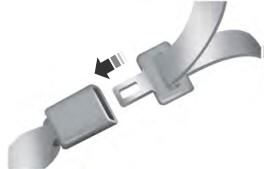
Fastening the Seatbelts
The front outboard and rear safety restraints in the vehicle are combination lap and shoulder belts.

Copyright © 2026 www.foexplorer.com
