Ford Explorer: Transfer Case / Removal and Installation - Transfer Case Input Shaft Seal
Ford Explorer 2020-2026 Service Manual / Powertrain / Automatic Transmission / Transfer Case / Removal and Installation - Transfer Case Input Shaft Seal
Special Tool(s) / General Equipment
.jpg) |
205-1018 Installation Tube |
.jpg) |
308-943 Installer, Input Seal |
Removal
-
With the vehicle in NEUTRAL, position it on a hoist.
Refer to: Jacking and Lifting - Overview (100-02 Jacking and Lifting, Description and Operation).
-
Remove the transfer case.
-
Remove the transfer case input shaft seal.
.jpg) |
Installation
-
NOTE: Apply petroleum jelly to the outer circumference of the oil seal.
Use Special Service Tool: 205-1018 Installation Tube. , 308-943 Installer, Input Seal.
.jpg) |
-
Install the transfer case.
 Removal and Installation - Transfer Case Front Output Shaft Seal
Special Tool(s) /
General Equipment
205-1018Installation Tube
205-1067Installer, Output Shaft AWD
Removal
With the vehicle in NEUTRAL, position it on a hoist...
 Removal and Installation - Transfer Case Rear Seal
Special Tool(s) /
General Equipment
205-072Universal Flange Holding Wrench
205-1018Installation Tube
205-1067Installer, Output Shaft AWD
205-D027
(D80L-1013-A)
2 or 3 Jaw..
Other information:
Ford Explorer 2020-2026 Service Manual: Removal and Installation - Roof Front Frame
Special Tool(s) / General Equipment Resistance Spotwelding Equipment Spot Weld Drill Bit Locking Pliers Removal WARNING: Before beginning any service procedure in this manual, refer to health and safety warnings in section 100-00 General Information...
Ford Explorer 2020-2026 Owners Manual: Cleaning Leather Seats
Note: Follow the same procedure as cleaning leather seats for cleaning leather instrument panels and leather interior trim surfaces. For routine cleaning, wipe the surface with a soft, damp cloth and a mild soap and water solution. Dry the area with a clean, soft cloth...
Categories
- Manuals Home
- 6th Generation Explorer Owners Manual
- 6th Generation Explorer Service Manual
- Removal and Installation - All-Wheel Drive (AWD) Module
- Electric Parking Brake
- General Procedures - Transmission Fluid Drain and Refill
- New on site
- Most important about car
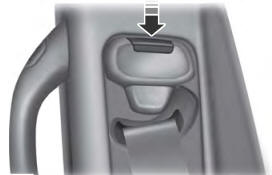
Seatbelt Height Adjustment
WARNING: Position the seatbelt height adjuster so that the seatbelt rests across the middle of your shoulder. Failure to adjust the seatbelt correctly could reduce its effectiveness and increase the risk of injury in a crash.

Copyright © 2026 www.foexplorer.com
