Ford Explorer: Generator and Regulator / Removal and Installation - Generator - 2.3L EcoBoost (201kW/273PS)
Materials
| Name | Specification |
|---|---|
| Motorcraft® Silicone Brake Caliper Grease and Dielectric Compound XG-3-A |
ESE-M1C171-A |
Removal
NOTE: Removal steps in this procedure may contain installation details.
-
With the vehicle in NEUTRAL, position it on a hoist.
Refer to: Jacking and Lifting - Overview (100-02 Jacking and Lifting, Description and Operation).
-
Disconnect the negative battery cable from the battery.
Refer to: Battery Disconnect and Connect (414-01 Battery, Mounting and Cables, General Procedures).
-
NOTICE: Do not pull the engine appearance cover forward or sideways to remove. Failure to pull straight upward on the underside of the cover at the attachment points may result in damage to the cover or engine components.
Remove the nuts and the engine appearance cover.
.jpg) |
-
Remove the bolt and the accessory drive belt cover.
Torque: 18 lb.ft (25 Nm)
.jpg) |
-
NOTICE: The turbocharger compressor vanes can be damaged by even the smallest particles. When removing any turbocharger or engine air intake system component, ensure that no debris enters the system. Failure to do so may result in damage to the turbocharger.
Loosen the clamp and position the CAC tube aside.
Torque: 48 lb.in (5.4 Nm)
.jpg) |
-
NOTICE: After installation, make sure the accessory drive belt is correctly seated on all the pulleys, if the belt is not properly seated on all of the pulleys component damage will occur.
-
Rotate the accessory drive belt tensioner counterclockwise.
-
Position the accessory drive belt aside.
-
Rotate the accessory drive belt tensioner counterclockwise.
.jpg) |
-
-
Remove the generator stud nut.
Torque: 80 lb.in (9 Nm)
-
Position the coolant hose bracket aside.
-
Remove the generator stud nut.
.jpg) |
-
NOTICE: When installing the B+ terminal nut to the generator, finger-start the nut before tightening or component damage may occur.
Disconnect the generator electrical connector. Position the B+ wire protective cover, remove the nut and position the B+ wire aside.
Torque: 155 lb.in (17.5 Nm)
.jpg) |
-
Remove the LHF wheel and tire.
Refer to: Wheel and Tire (204-04A Wheels and Tires, Removal and Installation).
-
Remove the pin-type retainers and the steering shield from the LH subframe.
.jpg) |
-
Detach the wire harness retainers from the generator lower stud bolts.
.jpg) |
-
Remove the upper generator stud bolt.
Torque: 18 lb.ft (25 Nm)
.jpg) |
-
Remove the lower stud bolts and the generator.
Torque: 18 lb.ft (25 Nm)
.jpg) |
Installation
-
To install, reverse the removal procedure.
-
Position the generator on the dowel pins. Do not fully
tighten the generator fasteners until all of the fasteners are installed
finger-tight.
.jpg) |
-
NOTE: Lubricating the grommets with silicone grease will aid in the installation of the engine appearance cover, and any future removal and installation of the cover.
-
Lubricate each grommet with silicone grease.
Material: Motorcraft® Silicone Brake Caliper Grease and Dielectric Compound / XG-3-A (ESE-M1C171-A)
-
Position the engine appearance cover onto engine with the grommet aligned with the stud.
-
Press down on the engine appearance cover at the
grommet location to attach the grommet onto the stud and install the
nuts.
Torque: 44 lb.in (5 Nm)
-
Lubricate each grommet with silicone grease.
.jpg) |
 Specifications
General Specifications
Item
Specification
2.3L EcoBoost - Limited and XLT with trailer tow vehicles built before October 2020
Rating
..
 Removal and Installation - Generator Pulley
Removal
WARNING:
Before beginning any service procedure in this
section, refer to Safety Warnings in section 100-00 General Information...
Other information:
Ford Explorer 2020-2025 Service Manual: Removal and Installation - Rear Bumper
Removal NOTE: Removal steps in this procedure may contain installation details. All vehicles Remove the rear bumper cover. Refer to: Rear Bumper Cover (501-19 Bumpers, Removal and Installation). Vehicles without trailer tow package On both sides...
Ford Explorer 2020-2025 Owners Manual: Changing the Rear Wiper Blades
You can improve poor wiper quality by cleaning the wiper blades and the windshield. Replace the wiper blades at least annually for optimum performance. Lift the wiper arm.Note: Do not hold the wiper blade to lift the wiper arm. Remove the wiper blade...
Categories
- Manuals Home
- 6th Generation Explorer Owners Manual
- 6th Generation Explorer Service Manual
- Engine
- Interior Trim and Ornamentation
- Removal and Installation - Front Halfshaft Speed Sensor
- New on site
- Most important about car
Windshield Wipers
 Push the lever up or down to operate
the windshield wipers.
Push the lever up or down to operate
the windshield wipers.
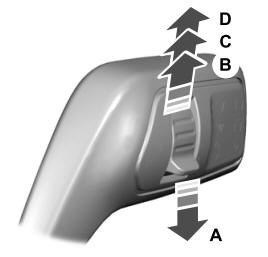
A - Single wipe.