Ford Explorer: Glass, Frames and Mechanisms / Removal and Installation - Driver Door Window Control Switch
Ford Explorer 2020-2025 Service Manual / Body and Paint / Body and Paint / Glass, Frames and Mechanisms / Removal and Installation - Driver Door Window Control Switch
Special Tool(s) / General Equipment
| Interior Trim Remover |
Removal
-
Remove the driver door window control switch and bezel as an assembly.
-
Release the clips.
Use the General Equipment: Interior Trim Remover
-
Disconnect the electrical connector and remove the
driver door window control switch and bezel as an assembly.
-
Release the clips.
.jpg) |
-
NOTE: This step is only necessary when installing a new component.
Remove the driver door window control switch.
-
Remove the screws from driver door window control switch.
-
Remove the driver door window control switch from the bezel assembly.
-
Remove the screws from driver door window control switch.
.jpg) |
Installation
-
To install, reverse the removal procedure.
 General Procedures - Power Door Window Initialization
Initialization
WARNING:
Before beginning any service procedure in this
section, refer to Safety Warnings in section 100-00 General Information...
 Removal and Installation - Front Door Glass Run and Bracket
Removal
NOTE:
LH (left-hand) side shown, RH (right-hand) side similar.
Remove the exterior front door handle reinforcement.
Refer to: Exterior Front Door Handle Reinforcement (501-14 Ha..
Other information:
Ford Explorer 2020-2025 Owners Manual: Checking MyKey System Status
You can find information about your programmed MyKeys by using the touchscreen. See Settings. MyKey Distance Tracks the distance when drivers use a MyKey. The only way to delete the accumulated distance is by using an admin key to clear all MyKeys...
Ford Explorer 2020-2025 Service Manual: Removal and Installation - Third Row Seat Backrest Cover
Special Tool(s) / General Equipment Flat-Bladed Screwdriver Interior Trim Remover Removal NOTE: LH (left hand) shown, RH (right hand) similar. Remove the third row seat backrest. Refer to: Third Row Seat Backrest (501-10C Third Row Seats, Removal and Installation)...
Categories
- Manuals Home
- 6th Generation Explorer Owners Manual
- 6th Generation Explorer Service Manual
- Engine
- Auxiliary Power Points
- General Procedures - Transmission Fluid Drain and Refill
- New on site
- Most important about car
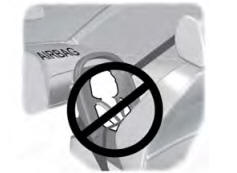
Children and Airbags
WARNING: Airbags can kill or injure a child in a child restraint. Never place a rear-facing child restraint in front of an active airbag. If you must use a forward-facing child restraint in the front seat, move the seat upon which the child restraint is installed all the way back.
Copyright © 2025 www.foexplorer.com