Ford Explorer: Transfer Case / Removal - Transfer Case
Ford Explorer 2020-2026 Service Manual / Powertrain / Automatic Transmission / Transfer Case / Removal - Transfer Case
-
With the vehicle in NEUTRAL, position it on a hoist.
Refer to: Jacking and Lifting - Overview (100-02 Jacking and Lifting, Description and Operation).
-
If equipped, remove the transfer case heat shield.
.jpg) |
-
NOTE: Take extra care not to damage the component.
Position aside and support the rear driveshaft.
-
Mark the driveshaft flex coupling to the transfer case flange.
-
Remove and discard the driveshaft flex coupling to transfer case flange bolts.
-
Mark the driveshaft flex coupling to the transfer case flange.
.jpg) |
-
Remove the transmission support crossmember.
Refer to: Transmission Support Insulator (307-01A Automatic Transmission - 10-Speed Automatic Transmission – 10R60, Removal and Installation).
Refer to: Transmission Support Insulator (307-01B Automatic Transmission - 10-Speed Automatic Transmission – 10R80, Removal and Installation).
Refer to: Transmission Support Insulator (307-01C Automatic Transmission - 10-Speed Automatic Transmission – 10R80 MHT, Removal and Installation).
-
NOTICE: Make sure that the vent hose/valve is not blocked.
Detach the transfer case vent hose and position aside.
.jpg) |
-
Disconnect the transfer case wiring connector.
.jpg) |
-
Remove and discard the transfer case mounting bolts.
.jpg) |
-
Remove and discard the transfer case mounting bolts.
.jpg) |
-
Disconnect the transfer case from the transmission output
shaft and the driveshaft. Remove the transfer case from the vehicle.
.jpg) |
-
Remove and Install a new front driveshaft slip yoke boot.
Refer to: Front Driveshaft Slip Yoke Boot (205-01 Driveshaft, Removal and Installation).
 Removal and Installation - Transfer Case Rear Seal
Special Tool(s) /
General Equipment
205-072Universal Flange Holding Wrench
205-1018Installation Tube
205-1067Installer, Output Shaft AWD
205-D027
(D80L-1013-A)
2 or 3 Jaw..
 Installation - Transfer Case
Materials
Name
Specification
Motorcraft® High Temperature 4x4 Front Axle and Wheel Bearing GreaseXG-11
WSS-M1C267-A1
NOTICE:
Do not over-lubricate the driveshaft ..
Other information:
Ford Explorer 2020-2026 Owners Manual: Roadside Assistance
Vehicles Sold in the United States: Getting Roadside Assistance To fully assist you should you have a vehicle concern, Ford Motor Company offers a complimentary roadside assistance program. This program is separate from the New Vehicle Limited Warranty...
Ford Explorer 2020-2026 Service Manual: Removal and Installation - Drive Pinion Seal
Special Tool(s) / General Equipment 205-1061Installer, Pinion Seal 8.8 205-1062Installer, Pinion Seal 8.15 205-199 (T83T-3132-A1) Installer, Spindle/Axle ShaftT83-4000-ATKIT-1983-FTKIT-1983-FLMTKIT-1983-FX Flat Headed Screw Driver Materials Name Specification Motorcraft® Premium Long-Life GreaseXG-1-E1 ESA-M1C75-B Removal With the..
Categories
- Manuals Home
- 6th Generation Explorer Owners Manual
- 6th Generation Explorer Service Manual
- Automatic Transmission
- Body and Paint
- General Procedures - Rear Camber Adjustment
- New on site
- Most important about car
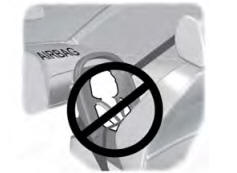
Children and Airbags
WARNING: Airbags can kill or injure a child in a child restraint. Never place a rear-facing child restraint in front of an active airbag. If you must use a forward-facing child restraint in the front seat, move the seat upon which the child restraint is installed all the way back.
Copyright © 2026 www.foexplorer.com