
Ford Explorer: Exterior Trim and Ornamentation / Removal and Installation - Liftgate Moulding
Ford Explorer 2020-2026 Service Manual / Body and Paint / Body and Paint / Exterior Trim and Ornamentation / Removal and Installation - Liftgate Moulding
Removal
NOTE: Removal steps in this procedure may contain installation details.
-
Remove the liftgate trim panel.
Refer to: Liftgate Trim Panel (501-05 Interior Trim and Ornamentation, Removal and Installation).
-
Disconnect the washer hose and the electrical connector.
.jpg) |
-
Remove the bolts.
Torque: 28 lb.in (3.2 Nm)
.jpg) |
-
Remove the retainer clips.
.jpg) |
-
Remove the liftgate moulding.
.jpg) |
Installation
-
To install, reverse the removal procedure.
 Removal and Installation - Front Fender Moulding
Removal
NOTE:
Removal steps in this procedure may contain installation details.
NOTE:
LH side shown, RH side similar.
Remove the screws...
 Removal and Installation - Rear Door Moulding
Removal
NOTE:
Removal steps in this procedure may contain installation details.
NOTE:
LH side door shown, RH side door similar.
Using a non-marring trim tool, disengage the moul..
Other information:
Ford Explorer 2020-2026 Owners Manual: Optional Settings
You can configure certain vehicle feature settings when you first create a MyKey. You can also change the settings afterward with an admin key. Note: Not every feature applies to every vehicle in every market. When they are available for your vehicle, then they appear in your information display, providing choices to switch them on or off, or to select a more specific setting...
Ford Explorer 2020-2026 Service Manual: Removal and Installation - Running Board
Removal NOTE: Removal steps in this procedure may contain installation details. NOTE: LH side shown, RH side similar. NOTE: This step requires the aid of another technician. Remove the bolts and the running board assembly. Torque: 177 lb...
Categories
- Manuals Home
- 6th Generation Explorer Owners Manual
- 6th Generation Explorer Service Manual
- Automatic Transmission
- Body and Paint
- Electric Parking Brake
- New on site
- Most important about car
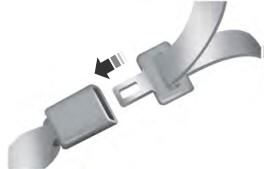
Fastening the Seatbelts
The front outboard and rear safety restraints in the vehicle are combination lap and shoulder belts.

Copyright © 2026 www.foexplorer.com