Ford Explorer: Exterior Trim and Ornamentation / Removal and Installation - Rear Door Moulding
Ford Explorer 2020-2026 Service Manual / Body and Paint / Body and Paint / Exterior Trim and Ornamentation / Removal and Installation - Rear Door Moulding
Removal
NOTE: Removal steps in this procedure may contain installation details.
NOTE: LH side door shown, RH side door similar.
-
Using a non-marring trim tool, disengage the moulding retainers attaching the moulding to the door.
.jpg) |
-
Remove and discard the moulding.
.jpg) |
Installation
-
To install, reverse the removal procedure.
 Removal and Installation - Liftgate Moulding
Removal
NOTE:
Removal steps in this procedure may contain installation details.
Remove the liftgate trim panel.
Refer to: Liftgate Trim Panel (501-05 Interior Trim and Ornamentation, ..
 Removal and Installation - Rear Door Upper Moulding
Removal
NOTE:
Removal steps in this procedure may contain installation details.
NOTE:
LH side shown, RH side similar.
Remove the upper belt moulding screw at front of the door...
Other information:
Ford Explorer 2020-2026 Service Manual: Removal and Installation - Rear Climate Control Housing
Removal NOTICE: During the removal or installation of components, cap, tape or otherwise appropriately protect all openings and tubes/fittings to prevent the ingress of dirt or other contamination. Remove caps, tape and other protective materials prior to installation...
Ford Explorer 2020-2026 Service Manual: Description and Operation - Charging System - System Operation and Component Description
System Operation System Diagram Item Description 1 PCM 2 GWM 3 IPC 4 Generator 5 Generator current sensor 6 HS-CAN1 7 HS-CAN1 8 HS-CAN3 9 BCM 10 Battery monitoring sensor Network Message Chart Module Network Input Messages — Body Control Module (BCM) ..
Categories
- Manuals Home
- 6th Generation Explorer Owners Manual
- 6th Generation Explorer Service Manual
- Engine
- Fuel Filler Funnel Location & Running Out of Fuel
- Electric Parking Brake
- New on site
- Most important about car
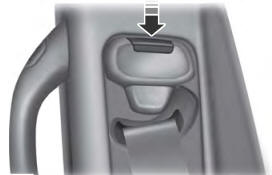
Seatbelt Height Adjustment
WARNING: Position the seatbelt height adjuster so that the seatbelt rests across the middle of your shoulder. Failure to adjust the seatbelt correctly could reduce its effectiveness and increase the risk of injury in a crash.

Copyright © 2026 www.foexplorer.com
