Ford Explorer: Handles, Locks, Latches and Entry Systems / Removal and Installation - Ignition Lock Cylinder
Special Tool(s) / General Equipment
| Flat-Bladed Screwdriver |
Removal
Non-functional lock cylinder
NOTE: For non-functional ignition lock cylinders, replace the ignition lock cylinder housing.
-
Remove the ignition lock cylinder housing.
Refer to: Ignition Lock Cylinder Housing (211-05 Steering Wheel and Column Electrical Components, Removal and Installation).
Functional lock cylinder
NOTE: Repair individual lock cylinders by discarding the inoperative lock cylinder and building a new lock cylinder using the appropriate lock repair service kit. The lock repair service kit includes a detailed instruction sheet to build the new lock to match the key cut pattern for the vehicle, thus allowing for single point replacement without needing to replace or reprogram other locks or keys.
-
Remove the PATSTransceiver.
Refer to: Passive Anti-Theft System (PATS) Transceiver (419-01B Passive Anti-Theft System (PATS), Removal and Installation).
-
Remove the ignition lock cylinder.
-
Insert the ignition key and position the ignition lock cylinder to the ACC position.
-
Using a screwdriver, press the ignition lock cylinder release pin through the access hole.
Use the General Equipment: Flat-Bladed Screwdriver
-
Pulling the ignition lock cylinder outward, remove the ignition lock cylinder.
-
Insert the ignition key and position the ignition lock cylinder to the ACC position.
.jpg) |
Installation
-
To install, reverse the removal procedure.
-
Install the ignition lock cylinder.
-
Make sure the ignition lock cylinder is in the ACC position.
-
Insert the ignition lock cylinder into the ignition
lock cylinder housing located on the steering column. Make sure to align
the locking pin with the locking pin access hole.
-
Rotate the ignition key through all lock cylinder positions to check for correct operation
-
Make sure the ignition lock cylinder is in the ACC position.
 Removal and Installation - Hood Latch Release Handle
Removal
Remove the hood latch release handle.
Rotate the hood latch release handle.
NOTE:
Do not remove the retaining clip from the hood latch release handle...
 Removal and Installation - Interior Front Door Handle
Removal
NOTE:
LH (left-hand) side shown, RH (right-hand) side similar.
Remove the front door trim panel.
Refer to: Front Door Trim Panel (501-05 Interior Trim and Ornamentation, Removal..
Other information:
Ford Explorer 2020-2026 Service Manual: Description and Operation - Parking Aid - Component Location
C..
Ford Explorer 2020-2026 Service Manual: Description and Operation - Module Controlled Functions - System Operation and Component Description
System Operation BCM The BCM controls various systems by monitoring inputs from switches, sensors and network messages from other modules and components on the HS-CAN1 and LIN. Based on these inputs, the BCM activates outputs. For example, the BCM monitors the HCM input...
Categories
- Manuals Home
- 6th Generation Explorer Owners Manual
- 6th Generation Explorer Service Manual
- Traction Control
- General Procedures - Rear Camber Adjustment
- Engine - 2.3L EcoBoost (201kW/273PS)
- New on site
- Most important about car
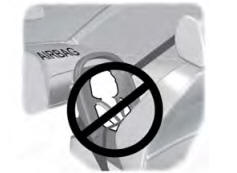
Children and Airbags
WARNING: Airbags can kill or injure a child in a child restraint. Never place a rear-facing child restraint in front of an active airbag. If you must use a forward-facing child restraint in the front seat, move the seat upon which the child restraint is installed all the way back.