Ford Explorer: Parking Aid - Vehicles With: Rear Parking Aid / Removal and Installation - Front Parking Aid Sensor
Ford Explorer 2020-2026 Service Manual / Electrical / Instrumentation and Warning Systems / Parking Aid - Vehicles With: Rear Parking Aid / Removal and Installation - Front Parking Aid Sensor
Removal
-
Remove the front bumper cover.
Refer to: Front Bumper Cover (501-19 Bumpers, Removal and Installation).
-
Remove the front parking aid sensor.
-
Disconnect the electrical connector.
-
Release the tabs.
-
Remove the sensor.
-
Disconnect the electrical connector.
.jpg) |
Installation
NOTE: Make sure that the isolator rings are installed correctly while installing the sensors.
-
To install, reverse the removal procedure.
-
Carry out the azimuth system check.
Refer to: Azimuth System Check (413-13A Parking Aid - Vehicles With: Rear Parking Aid, General Procedures).
-
Carry out the elevation system check.
Refer to: Elevation System Check (413-13A Parking Aid - Vehicles With: Rear Parking Aid, General Procedures).
-
If any sensor fails the checks, diagnose the sensor fault.
Refer to: Parking Aid (413-13A Parking Aid - Vehicles With: Rear Parking Aid, Diagnosis and Testing).
 General Procedures - Elevation System Check
Check
Turn the ignition ON, engine OFF.
Set the parking brake.
Place the gearshift in REVERSE (R) for rear parking aid sensors...
 Removal and Installation - Parking Assist Control Module (PAM)
Removal
NOTE:
If installing a new PAM,
it is necessary to upload the module configuration information to the
scan tool prior to removing the module...
Other information:
Ford Explorer 2020-2026 Service Manual: Removal and Installation - Fender Apron Panel Reinforcement
Special Tool(s) / General Equipment 6.5 mm Drill Bit Scraper for Straight Edges Polydrive Bit Socket Rivet Gun Belt Sander Torx Bit Socket Hot Air Gun Locking Pliers Materials Name Specification Metal Bonding AdhesiveTA-1, TA-1-B, 3M™ 08115, LORD Fusor® 108B - Seam SealerTA-2-B, 3M™ 08308, LORD Fusor® 805DTM - F..
Ford Explorer 2020-2026 Service Manual: Description and Operation - Parking Aid - Component Location
C..
Categories
- Manuals Home
- 6th Generation Explorer Owners Manual
- 6th Generation Explorer Service Manual
- Removal and Installation - All-Wheel Drive (AWD) Module
- General Service Information
- General Procedures - Brake Service Mode Activation and Deactivation
- New on site
- Most important about car
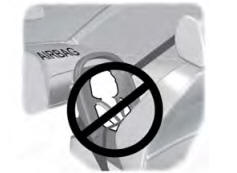
Children and Airbags
WARNING: Airbags can kill or injure a child in a child restraint. Never place a rear-facing child restraint in front of an active airbag. If you must use a forward-facing child restraint in the front seat, move the seat upon which the child restraint is installed all the way back.
Copyright © 2026 www.foexplorer.com