Ford Explorer: Glass, Frames and Mechanisms / Removal and Installation - Front Door Window Regulator and Motor
Special Tool(s) / General Equipment
| Punch |
Removal
.jpg) WARNING:
The following procedure prescribes critical repair steps
required for correct restraint system operation during a crash. Follow
all notes and steps carefully. Failure to follow step instructions may
result in incorrect operation of the restraint system and increases the
risk of serious personal injury or death in a crash.
WARNING:
The following procedure prescribes critical repair steps
required for correct restraint system operation during a crash. Follow
all notes and steps carefully. Failure to follow step instructions may
result in incorrect operation of the restraint system and increases the
risk of serious personal injury or death in a crash.
NOTE: Left hand (LH) shown, right hand (RH) similar.
NOTE: For front door window regulator motors that are non-functional it will be necessary to remove the front door window regulator motor prior to removing the front door window regulator.
NOTE: Removal steps in this procedure may contain installation details.
-
Depower the SRS.
WARNING:
Before beginning any service procedure in this
manual, refer to health and safety warnings in section 100-00 General
Information. Failure to follow this instruction may result in serious
personal injury.
Refer to: Supplemental Restraint System (SRS) Depowering (501-20B Supplemental Restraint System, General Procedures).
-
Remove the front door trim panel.
Refer to: Front Door Trim Panel (501-05 Interior Trim and Ornamentation, Removal and Installation).
-
Remove the front door window glass release access covers.
.jpg) |
-
Lower the front door window glass to the half down position.
-
Connect the window control switch.
-
Lower the front door window glass to the half down position.
-
Disconnect the window control switch.
-
Connect the window control switch.
.jpg) |
-
Release the front door window glass and tape in the full up position.
-
Release the front door window glass retaining clips.
Use the General Equipment: Punch
-
Raise the front door window glass in the full up position.
-
Tape the front door window glass in the full up position.
-
Release the front door window glass retaining clips.
.jpg) |
-
Position the front door wiring harness aside.
-
Disconnect the front door speaker electrical connector..
-
Disconnect the front door window regulator motor electrical connector.
-
Disconnect the front door side impact sensor electrical connector.
-
Release the front door wiring harness routing clips and position the front door wiring harness aside.
-
Disconnect the front door speaker electrical connector..
.jpg) |
-
Remove the front door window regulator nut adhesive covers.
.jpg) |
-
NOTE: Follow the unique instructions or graphic for this step in installation
loosen the front door window regulator nuts.
Torque: 71 lb.in (8 Nm)
.jpg) |
-
NOTE: Follow the unique instructions or graphic for this step in installation
Release the front door window regulator retaining clips.
-
Release the front door window regulator retaining clips.
Torque: 49 lb.in (5.5 Nm)
-
Position the front door window regulator retaining clips into the service position.
-
Release the front door window regulator retaining clips.
.jpg) |
-
Remove the front door window regulator.
-
Remove the front door window regulator.
-
Route the interior door handle cable, door lock
indicator cable and grommet through the front door window regulator.
-
Remove the front door window regulator.
.jpg) |
-
NOTE: This step is only necessary when installing a new component.
Remove the bolts and the front door side impact sensor.
Torque: 22 lb.in (2.5 Nm)
.jpg) |
-
NOTE: This step is only necessary when installing a new component.
Remove the front door window regulator motor.
-
Remove the front door window regulator bolts.
-
Remove the front door window regulator motor.
-
Remove the front door window regulator bolts.
.jpg) |
-
NOTE: This step is only necessary when installing a new component.
Remove the screws and the front door speaker.
Torque: 22 lb.in (2.5 Nm)
.jpg) |
Installation
-
To install, reverse the removal procedure.
-
Torque the retainers and nuts in the sequence shown.
-
Torque the retainers in the sequence shown.
Torque: 49 lb.in (5.5 Nm)
-
Torque the nuts in the sequence shown.
Torque: 71 lb.in (8 Nm)
-
Torque the retainers in the sequence shown.
.jpg) |
-
Repower the SRS.
Refer to: Supplemental Restraint System (SRS) Repowering (501-20B Supplemental Restraint System, General Procedures).
-
Carry out the power door window initialization.
Refer to: Power Door Window Initialization (501-11 Glass, Frames and Mechanisms, General Procedures).
 Removal and Installation - Front Door Window Glass
Removal
NOTE:
LH (left-hand) side shown, RH (right-hand) side similar.
Remove the front door window regulator and motor.
Refer to: Front Door Window Regulator and Motor (501-11 Glass, F..
 Removal and Installation - Front Door Window Regulator Motor
Removal
NOTE:
Left hand (LH) shown, right hand (RH) similar.
NOTE:
For front door window regulator motors that are
non-functional it may be necessary to remove the front door window
regulato..
Other information:
Ford Explorer 2020-2026 Owners Manual: Integrated Keyhead Transmitter (If Equipped)
Use the key blade to start your vehicle and unlock or lock the driver door from outside your vehicle. The integrated keyhead transmitter functions as a programmed ignition key that operates all the locks and starts your vehicle, as well as a remote control...
Ford Explorer 2020-2026 Service Manual: Removal and Installation - Oil Pump
Special Tool(s) / General Equipment 100-002 (TOOL-4201-C) Holding Fixture with Dial Indicator Gauge 303-1685Alignment Tool, Camshaft 303-1688Preload Tool, Balance Shaft 303-507Timing Peg, Crankshaft TDCTKIT-2001N-FLMTKIT-2001N-ROW Removal Remove the oil pan...
Categories
- Manuals Home
- 6th Generation Explorer Owners Manual
- 6th Generation Explorer Service Manual
- Body and Paint
- Engine
- Electric Parking Brake
- New on site
- Most important about car
Windshield Wipers
 Push the lever up or down to operate
the windshield wipers.
Push the lever up or down to operate
the windshield wipers.
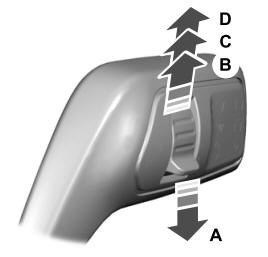
A - Single wipe.