Ford Explorer: Second Row Seats / Removal and Installation - Second Row Single Seat Backrest Cover - Vehicles With: Second Row Captain Chairs
Ford Explorer 2020-2025 Service Manual / Body and Paint / Body and Paint / Second Row Seats / Removal and Installation - Second Row Single Seat Backrest Cover - Vehicles With: Second Row Captain Chairs
Special Tool(s) / General Equipment
| Interior Trim Remover |
Removal
NOTE: LH (left hand) seat shown, RH (right hand) seat similar.
-
Remove the second row seat.
Refer to: Second Row Seat - Vehicles With: Second Row Captain Chairs (501-10B Second Row Seats, Removal and Installation).
-
Remove the second row single seat armrest.
Refer to: Second Row Single Seat Armrest - Vehicles With: Second Row Captain Chairs (501-10B Second Row Seats, Removal and Installation).
-
Remove the second row seat head restraint guide sleeve.
Refer to: Second Row Seat Head Restraint Guide Sleeve (501-10B Second Row Seats, Removal and Installation).
-
Release the retainers and remove the second row single seat easy entry seat fold switch bezel.
Use the General Equipment: Interior Trim Remover
.jpg) |
-
Remove the second row single seat center valance.
-
Release the retainer.
-
Release the retainer.
-
Release the retainer.
.jpg) |
-
Remove the second row single seat inboard side shield.
-
Remove the screw.
-
Detach the retainers.
Use the General Equipment: Interior Trim Remover
-
Lift the side shield and pull outward.
-
Lift the side shield and pull outward.
-
Push the side shield forward.
-
Remove the screw.
.jpg) |
-
-
Remove the second row single seat recline handle retaining clip.
-
Remove the second row seat recline handle.
-
Remove the second row single seat recline handle retaining clip.
.jpg) |
-
Remove the second row single seat outboard side shield.
-
Remove the screw.
-
Detach the retainers.
Use the General Equipment: Interior Trim Remover
-
Lift the side shield and pull outward.
-
Lift the side shield and pull outward.
-
Push the side shield forward.
-
Remove the screw.
.jpg) |
-
-
Remove the second row single seat backrest cover child safety seat tether anchor bezel.
Use the General Equipment: Interior Trim Remover
-
Release the second row single seat backrest cover lower J-clip
-
Lift the second row single seat backrest cover.
-
Remove the second row single seat backrest cover child safety seat tether anchor bezel.
.jpg) |
-
-
On both sides.
Unzip the second row single seat backrest cover.
-
Position the second row single seat backrest cover aside.
-
On both sides.
.jpg) |
-
-
Release the hook-and-loop retainer.
-
Remove the pin-type retainers.
-
Release the hook-and-loop retainer.
.jpg) |
-
If equipped.
Disconnect the second row single seat backrest heater mat electrical connector and release the retainers.
.jpg) |
-
-
If equipped.
Release the second row single seat backrest blower motor vent bag retaining clips
-
Remove the second row single seat backrest cover and foam.
-
If equipped.
.jpg) |
-
NOTICE: Use care when separating the seat backrest trim cover from the hook-and-loop strips or the hook-and-loop strips may be torn from the seat backrest foam.
NOTICE: Use care when separating the seat backrest trim cover from the hook-and arrow or the hook may be torn from the seat backrest foam.
NOTE: This step is only necessary when installing a new component.
Remove the second row single seat backrest cover.
-
Invert the cover.
-
Release the hook-and-loop strips.
-
Release the hook-and-arrows.
-
Invert the cover.
.jpg) |
Installation
-
To install, reverse the removal procedure.
 Removal and Installation - Second Row Single Seat Backrest Cover
Special Tool(s) /
General Equipment
Interior Trim Remover
Removal
NOTE:
Base vehicle shown, police vehicle similar.
NOTE:
LH (left hand) shown, RH (right hand) similar...
 Removal and Installation - Second Row Single Seat Cushion Cover
Special Tool(s) /
General Equipment
Interior Trim Remover
Removal
NOTE:
LH (left hand) seat shown, RH (right hand) seat similar.
NOTE:
Base vehicle shown, police vehicle similar...
Other information:
Ford Explorer 2020-2025 Service Manual: Description and Operation - Module Controlled Functions - Overview
B..
Ford Explorer 2020-2025 Service Manual: Removal and Installation - Ignition Lock Cylinder
Special Tool(s) / General Equipment Flat-Bladed Screwdriver Removal Non-functional lock cylinder NOTE: For non-functional ignition lock cylinders, replace the ignition lock cylinder housing. Remove the ignition lock cylinder housing...
Categories
- Manuals Home
- 6th Generation Explorer Owners Manual
- 6th Generation Explorer Service Manual
- Description and Operation - Identification Codes
- Traction Control
- General Procedures - Brake Service Mode Activation and Deactivation
- New on site
- Most important about car
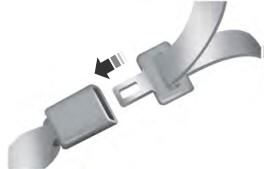
Fastening the Seatbelts
The front outboard and rear safety restraints in the vehicle are combination lap and shoulder belts.

Copyright © 2025 www.foexplorer.com
