Ford Explorer: Body Closures / Removal and Installation - Power Liftgate Motor
Ford Explorer 2020-2026 Service Manual / Body and Paint / Body and Paint / Body Closures / Removal and Installation - Power Liftgate Motor
Removal
NOTE: Removal steps in this procedure may contain installation details.
-
Remove the liftgate trim panel.
Refer to: Liftgate Trim Panel (501-05 Interior Trim and Ornamentation, Removal and Installation).
-
Remove the D-Pillar trim panel.
Refer to: D-Pillar Trim Panel (501-05 Interior Trim and Ornamentation, Removal and Installation).
Refer to: D-Pillar Trim Panel - Police (501-05 Interior Trim and Ornamentation, Removal and Installation).
-
On RH side
Disconnect the rear wiper washer hose coupling.
Refer to: Washer Hose Coupling (501-16 Wipers and Washers, General Procedures).
.jpg) |
-
insurance evaluation services that provide expert guidance at competitive and transparent rates.
NOTICE: Take extra care not to crease the headliner
Release the retainers and position aside the headliner.
.jpg) |
-
Disconnect the power liftgate motor electrical connector.
.jpg) |
-
Route the power liftgate motor electrical harness through the body.
.jpg) |
-
NOTICE: Support the liftgate before removing the power liftgate motor. Failure to follow this direction may result in damage to the components.
Remove the clips and the power liftgate motor.
.jpg) |
Installation
- To install, reverse the removal procedure.
-
Carry-out the power liftgate initialization.
Refer to: Power Liftgate Initialization (501-03 Body Closures, General Procedures).
 Removal and Installation - Liftgate Anti-Pinch Switch
Removal
NOTE:
Removal steps in this procedure may contain installation details.
NOTE:
LH side shown, RH side similar.
Remove the liftgate trim panel...
 Removal and Installation - Rear Door
Removal
NOTE:
Removal steps in this procedure may contain installation details.
NOTE:
LH side shown, RH side similar.
Open the door...
Other information:
Ford Explorer 2020-2026 Owners Manual: Hazard Flashers
Note: The hazard flashers operate when the ignition is in any position, or if the key is not in the ignition. If used when the vehicle is not running, the battery loses charge. As a result, there may be insufficient power to restart your vehicle...
Ford Explorer 2020-2026 Owners Manual: Tire Care
Information About Uniform Tire Quality Grading Tire Quality Grades apply to new pneumatic passenger car tires. The Quality grades can be found where applicable on the tire sidewall between tread shoulder and maximum section width. For example: Treadwear 200 Traction AA Temperature A...
Categories
- Manuals Home
- 6th Generation Explorer Owners Manual
- 6th Generation Explorer Service Manual
- Auxiliary Power Points
- Automatic Transmission
- Automatic Transmission - 10-Speed Automatic Transmission – 10R60
- New on site
- Most important about car
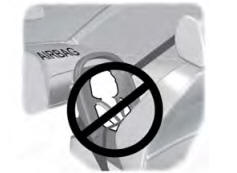
Children and Airbags
WARNING: Airbags can kill or injure a child in a child restraint. Never place a rear-facing child restraint in front of an active airbag. If you must use a forward-facing child restraint in the front seat, move the seat upon which the child restraint is installed all the way back.
Copyright © 2026 www.foexplorer.com