Ford Explorer: Climate Control System - General Information / Removal and Installation - Condenser Inlet Line - 2.3L EcoBoost (201kW/273PS)
Removal
NOTICE: During the removal of components, cap, tape or otherwise appropriately protect all openings to prevent the ingress of dirt or other contamination. Remove protective materials prior to installation.
NOTE: Removal steps in this procedure may contain installation details.
-
Recover the refrigerant. Refer to the appropriate Recovery procedure in Group 412.
-
Remove the horn.
Refer to: Horn (413-06 Horn, Removal and Installation).
-
NOTE: The condenser inlet and outlet lines are replaced as an assembly.
- Remove the condenser outlet line nut. Torque: 80 lb.in (9 Nm)
- Remove the condenser inlet line nut. Torque: 159 lb.in (18 Nm)
-
Make sure to cover any open ports to prevent debris from entering the system.
.jpg) |
-
Remove the PCM.
Refer to: Powertrain Control Module (PCM) (303-14A Electronic Engine Controls - 2.3L EcoBoost (201kW/273PS), Removal and Installation).
-
Detach the wiring harness routing clip and remove the PCM bracket.
Torque: 89 lb.in (10 Nm)
.jpg) |
-
Remove the RH headlamp assembly.
Refer to: Headlamp Assembly (417-01 Exterior Lighting, Removal and Installation).
-
-
Remove the condenser outlet line retainer.
Torque: 80 lb.in (9 Nm)
-
Remove the A/C compressor outlet line retainer and remove the condenser outlet and inlet line assembly.
Torque: 159 lb.in (18 Nm)
-
Make sure to cover any open ports to prevent debris from entering the system.
-
Remove the condenser outlet line retainer.
.jpg) |
Installation
-
To install, reverse the removal procedure.
-
NOTICE: Only use the specified material to lubricate the seals.
Install and lubricate new O-ring seals. Refer to the appropriate Specifications in Group 412.
-
Lubricate the refrigerant system with the correct amount
of clean PAG oil. Refer to the appropriate Refrigerant Oil Adding
procedure in Group 412.
 Removal and Installation - Condenser - 2.3L EcoBoost (201kW/273PS)
Removal
NOTICE:
During the removal of components, cap, tape or otherwise
appropriately protect all openings to prevent the ingress of dirt or
other contamination...
 Removal and Installation - Condenser Outlet Line - 2.3L EcoBoost (201kW/273PS)
Removal
NOTE:
The condenser inlet and outlet line are installed as a one-piece assembly.
Remove the condenser inlet line.
Refer to: Condenser Inlet Line - 2...
Other information:
Ford Explorer 2020-2025 Service Manual: Removal and Installation - A-Pillar Trim Panel - Police
Special Tool(s) / General Equipment Interior Trim Remover Removal NOTE: LH (left hand) shown, RH (right hand) similar. Release the wedge nut. Loosen the bolt 6 turns. Push the bolt in to release the wedge nut...
Ford Explorer 2020-2025 Service Manual: Description and Operation - Information and Entertainment System - System Operation and Component Description
System Operation System Diagram NOTE: The system diagrams include all component options. Some components may not be equipped on the vehicle. Audio System - 4 or 6 Speaker System Item Description 1 APIM 2 Audio Unit Antenna Amplifier 3 Steering Wheel Switches 4 Display Unit 5 SCCM 6 Clockspring 7 GWM 8 BCM ..
Categories
- Manuals Home
- 6th Generation Explorer Owners Manual
- 6th Generation Explorer Service Manual
- Description and Operation - Jacking and Lifting - Overview
- Engine
- Removal and Installation - Liftgate Trim Panel
- New on site
- Most important about car
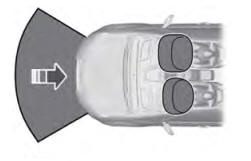
Driver and Passenger Airbags
WARNING: Do not place your arms on the airbag cover or through the steering wheel. Failure to follow this instruction could result in personal injury.
WARNING: Keep the areas in front of the airbags free from obstruction. Do not affix anything to or over the airbag covers. Objects could become projectiles during airbag deployment or in a sudden stop. Failure to follow this instruction could result in personal injury or death.
WARNING: Airbags can kill or injure a child in a child restraint. Never place a rear-facing child restraint in front of an active airbag. If you must use a forward-facing child restraint in the front seat, move the seat upon which the child restraint is installed all the way back.

