Ford Explorer: Interior Trim and Ornamentation / Removal and Installation - C-Pillar Trim Panel
Ford Explorer 2020-2026 Service Manual / Body and Paint / Body and Paint / Interior Trim and Ornamentation / Removal and Installation - C-Pillar Trim Panel
Removal
NOTE: LH (left hand) shown, RH (right hand) similar.
NOTE: Removal steps in this procedure may contain installation details.
-
Remove the loadspace trim panel.
Refer to: Loadspace Trim Panel (501-05 Interior Trim and Ornamentation, Removal and Installation).
Refer to: Loadspace Trim Panel - Police (501-05 Interior Trim and Ornamentation, Removal and Installation).
-
Remove the second row seatbelt retractor and pretensioner anchor bolt and position the seatbelt aside.
Torque: 35 lb.ft (47 Nm)
.jpg) |
-
Remove the C-pillar trim panel bolt.
Torque: 80 lb.in (9 Nm)
.jpg) |
-
Release the C-pillar trim panel magnets.
.jpg) |
-
NOTICE: The C-pillar trim panel must be positioned downward to allow the upper clip to release correctly. Failure to follow this direction may cause damage to the C-pillar trim panel.
Slide the C-pillar trim panel down, aligning the upper clip to the slot in the sheet metal.
.jpg) |
-
Remove the C-pillar trim panel.
-
Pull outward on the C-pillar trim panel.
-
Feed the second row seatbelt retractor and pretensioner through the opening in the C-pillar trim panel.
-
Pull outward on the C-pillar trim panel.
.jpg) |
Installation
NOTE: During installation, make sure the seatbelt webbing is not twisted and the seatbelts and buckles are accessible to the occupants.
-
To install, reverse the removal procedure.
-
Inspect and position the rear door weather strip lip so that it overlaps the top of the C-pillar trim panel.
.jpg) |
-
Check the seatbelt system for correct operation.
Refer to: Seatbelt Systems (501-20A Seatbelt Systems, Diagnosis and Testing).
 Removal and Installation - B-Pillar Trim Panel
Special Tool(s) /
General Equipment
Interior Trim Remover
Removal
NOTE:
LH (left hand) shown, RH (right hand) similar.
Upper and lower B-pillar trim panels
Remove the follow..
 Removal and Installation - D-Pillar Trim Panel
Special Tool(s) /
General Equipment
Interior Trim Remover
Removal
NOTE:
LH (left hand) shown, RH (right hand) similar.
NOTE:
Removal steps in this procedure may contain installatio..
Other information:
Ford Explorer 2020-2026 Service Manual: Description and Operation - Exhaust System - Overview
Overview NOTICE: Do not use leaded fuel in a vehicle equipped with a catalytic converter. In a vehicle that is continually misfueled, the lead in the fuel will be deposited in the catalytic converter and completely blanket the catalyst. Lead reacts with platinum to "poison" the catalyst...
Ford Explorer 2020-2026 Service Manual: Description and Operation - Symbols Glossary
Symbols are used inside the graphics and in the text area to enhance the information display. Movement Symbols Movement symbols provide detailed information to a required component movement. These component movements can be rotational or 1-3 dimensional movements...
Categories
- Manuals Home
- 6th Generation Explorer Owners Manual
- 6th Generation Explorer Service Manual
- Description and Operation - Jacking and Lifting - Overview
- General Procedures - Brake Service Mode Activation and Deactivation
- Automatic Transmission - 10-Speed Automatic Transmission – 10R60
- New on site
- Most important about car
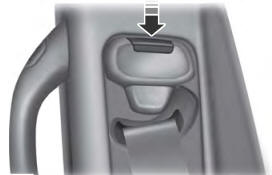
Seatbelt Height Adjustment
WARNING: Position the seatbelt height adjuster so that the seatbelt rests across the middle of your shoulder. Failure to adjust the seatbelt correctly could reduce its effectiveness and increase the risk of injury in a crash.

Copyright © 2026 www.foexplorer.com
