Ford Explorer: Automatic Transmission - 10-Speed Automatic Transmission – 10R60 / Removal and Installation - Transmission Fluid Pan, Gasket and Filter
Materials
| Name | Specification |
|---|---|
| Motorcraft® MERCON® ULV Automatic Transmission Fluid XT-12-QULV |
WSS-M2C949-A, MERCON® ULV |
Removal
-
With the vehicle in NEUTRAL, position it on a hoist.
Refer to: Jacking and Lifting - Overview (100-02 Jacking and Lifting, Description and Operation).
-
Remove the retainers and heatshield.
.jpg) |
-
If equipped, remove the retainers from the NVH cover.
.jpg) |
-
NOTE: Note the location of the bolts and studbolts for assembly.
Remove the transmission fluid pan bolts and the transmission fluid pan and allow the transmission fluid to drain.
.jpg) |
-
NOTE: The transmission fluid pan gasket can be reused if not damaged.
NOTE: Note the location of the alignment tabs.
Remove the transmission fluid pan gasket.
.jpg) |
-
NOTE: The transmission fluid filter may be reused if no excessive contamination is indicated.
NOTE: Note the location of the bolts for assembly.
Remove the bolts and the transmission fluid filter.
-
Short bolt
-
Long bolt
-
Short bolt
.jpg) |
-
Clean and inspect the transmission fluid pan and magnets.
.jpg) |
Installation
-
NOTE: If the transmission is being repaired for a contamination-related failure, install a new transmission fluid filter and seal assembly. The transmission fluid filter may be reused if no excessive contamination is indicated.
Inspect the transmission fluid filter seal. If necessary, replace the transmission fluid filter seal.
.jpg) |
-
Lubricate the transmission fluid filter seal with automatic transmission fluid.
Material: Motorcraft® MERCON® ULV Automatic Transmission Fluid / XT-12-QULV (WSS-M2C949-A, ) (MERCON® ULV)
.jpg) |
-
NOTICE: If the bolts are installed in the wrong locations, transmission damage will occur.
NOTE: The transmission fluid filter may be reused if no excessive contamination is indicated.
Install the filter and the bolts in the correct locations.
-
Short bolt
-
Long bolt
- Torque: 93 lb.in (10.5 Nm)
-
Short bolt
|
-
NOTE: The transmission fluid pan gasket can be reused if not damaged.
NOTE: Align the transmission fluid pan gasket tabs in the correct locations.
Install a new transmission fluid pan gasket if required.
|
-
NOTE: Install the bolts and studbolts in the correct locations noted during removal.
Install the transmission fluid pan and loosely install the bolts and studbolts.
-
Tighten the studbolts in a crisscross pattern.
Torque: 106 lb.in (12 Nm)
-
Tighten the bolts in a crisscross pattern.
Torque: 89 lb.in (10 Nm)
-
Tighten the studbolts in a crisscross pattern.
.jpg) |
-
If equipped, install the NVH cover retainers.
|
-
Install the heatshield and retainers.
Torque: 80 lb.in (9 Nm)
|
-
Fill and check the transmission fluid.
Refer to: Transmission Fluid Drain and Refill (307-01A Automatic Transmission - 10-Speed Automatic Transmission – 10R60, General Procedures).
 Removal and Installation - Transmission Fluid Auxiliary Pump
Removal
NOTE:
It is not necessary to remove the transmission fluid
filter to remove the transmission fluid auxiliary pump.
Remove the transmission fluid pan and gasket...
 Removal and Installation - Transmission Fluid Pump
Removal
Remove the main control valve body.
Refer to: Main Control Valve Body (307-01A Automatic Transmission - 10-Speed Automatic Transmission – 10R60, Removal and Installation)...
Other information:
Ford Explorer 2020-2025 Service Manual: Description and Operation - B Clutch
Overview Item Description 1 SSB 2 B clutch control valve 3 B clutch latch valve 4 B clutch apply circuit 5 B clutch piston 6 B clutch assembly 7 One-Way Clutch (OWC) 8 Sun gear No...
Ford Explorer 2020-2025 Service Manual: Removal and Installation - Body Control Module C (BCMC)
Removal NOTE: Removal steps in this procedure may contain installation details. NOTE: If the BCMC did not respond to the diagnostic scan tool, As-Built Data may need to be entered as part of the repair. This step is only necessary if the BCMC is being replaced...
Categories
- Manuals Home
- 6th Generation Explorer Owners Manual
- 6th Generation Explorer Service Manual
- Removal and Installation - All-Wheel Drive (AWD) Module
- Traction Control
- General Procedures - Transmission Fluid Drain and Refill
- New on site
- Most important about car
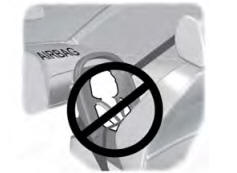
Children and Airbags
WARNING: Airbags can kill or injure a child in a child restraint. Never place a rear-facing child restraint in front of an active airbag. If you must use a forward-facing child restraint in the front seat, move the seat upon which the child restraint is installed all the way back.