Ford Explorer: Supplemental Restraint System / Removal and Installation - Seat Position Sensor
Ford Explorer 2020-2026 Service Manual / Body and Paint / Body and Paint / Supplemental Restraint System / Removal and Installation - Seat Position Sensor
Removal
NOTE: Typical LH (left-hand) seat shown, RH (right-hand) seat similar.
NOTE: Removal steps in this procedure may contain installation details.
-
Raise the seat to the full up position.
.jpg) |
-
-
Disconnect the electrical connector.
-
Remove the screw.
Torque: 8 lb.in (0.9 Nm)
-
Remove the seat position sensor.
-
Disconnect the electrical connector.
.jpg) |
Installation
-
To install, reverse the removal procedure.
 Removal and Installation - Restraints Control Module (RCM)
Removal
WARNING:
The following procedure prescribes critical repair steps
required for correct restraint system operation during a crash. Follow
all notes and steps carefully...
 Removal and Installation - Side Airbag
Removal
WARNING:
The following procedure prescribes critical repair steps
required for correct restraint system operation during a crash. Follow
all notes and steps carefully...
Other information:
Ford Explorer 2020-2026 Owners Manual: Overriding the Set Speed
WARNING: If you override the system by pressing the accelerator pedal, it does not automatically apply the brakes to maintain a gap from any vehicle ahead. When you press the accelerator pedal, you override the set speed and gap distance. Use the accelerator pedal normally to intentionally exceed the set speed limit...
Ford Explorer 2020-2026 Service Manual: General Procedures - Plastic Repairs
Materials Name Specification Plastic Bonding AdhesiveTA-9 - Inspection NOTE: Plastics Identification WARNING: Before beginning any service procedure in this manual, refer to health and safety warnings in section 100-00 General Information...
Categories
- Manuals Home
- 6th Generation Explorer Owners Manual
- 6th Generation Explorer Service Manual
- Using Tether Straps
- Removal and Installation - All-Wheel Drive (AWD) Module
- General Procedures - Brake Service Mode Activation and Deactivation
- New on site
- Most important about car
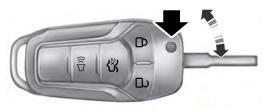
Integrated Keyhead Transmitter (If Equipped)
Use the key blade to start your vehicle and unlock or lock the driver door from outside your vehicle. The integrated keyhead transmitter functions as a programmed ignition key that operates all the locks and starts your vehicle, as well as a remote control.

Copyright © 2026 www.foexplorer.com
