Ford Explorer: Exterior Lighting / Removal and Installation - Headlamp Assembly
Ford Explorer 2020-2026 Service Manual / Electrical / Lighting / Exterior Lighting / Removal and Installation - Headlamp Assembly
Removal
NOTE: Removal steps in this procedure may contain installation details.
-
Remove the front bumper cover.
Refer to: Front Bumper Cover (501-19 Bumpers, Removal and Installation).
-
Remove the 5 headlamp assembly bolts.
Torque: 28 lb.in (3.2 Nm)
.jpg) |
-
Release the tab and position the headlamp assembly forward.
.jpg) |
-
Disconnect the electrical connectors and remove the headlamp assembly.
.jpg) |
Installation
-
To install, reverse the removal procedure.
-
NOTE: This step is only necessary when installing a new component.
Adjust the headlamp assembly.
Refer to: Headlamp Adjustment (417-01 Exterior Lighting) .
 Removal and Installation - Front Fog Lamp
Removal
NOTE:
Removal steps in this procedure may contain installation details.
Remove the front bumper cover.
Refer to: Front Bumper Cover (501-19 Bumpers, Removal and Installation)...
 Removal and Installation - Headlamp Control Module (HCM)
Removal
NOTE:
This step is only necessary if the HCM is being replaced.
NOTE:
If installing a new module, it is necessary to
upload the module configuration information to the scan tool..
Other information:
Ford Explorer 2020-2026 Service Manual: Removal and Installation - Ignition Lock Cylinder
Special Tool(s) / General Equipment Flat-Bladed Screwdriver Removal Non-functional lock cylinder NOTE: For non-functional ignition lock cylinders, replace the ignition lock cylinder housing. Remove the ignition lock cylinder housing...
Ford Explorer 2020-2026 Service Manual: Removal and Installation - Instrument Panel
Special Tool(s) / General Equipment Flat Headed Screw Driver Interior Trim Remover Removal All vehicles NOTE: Removal steps in this procedure may contain installation details. Drain the cooling system. Refer to: Engine Cooling System Draining, Vacuum Filling and Bleeding (303-03D Engine Cooling - 3...
Categories
- Manuals Home
- 6th Generation Explorer Owners Manual
- 6th Generation Explorer Service Manual
- Body and Paint
- Removal and Installation - All-Wheel Drive (AWD) Module
- Auxiliary Power Points
- New on site
- Most important about car
Locking and Unlocking
You can use the power door lock control or the remote control to lock and unlock your vehicle.
Power Door Locks
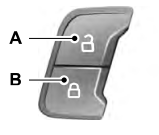
The power door lock control is on the driver and front passenger door panels.

Copyright © 2026 www.foexplorer.com
