Ford Explorer: Front End Body Panels / Removal and Installation - Fender
Ford Explorer 2020-2026 Service Manual / Body and Paint / Body and Paint / Front End Body Panels / Removal and Installation - Fender
Special Tool(s) / General Equipment
| Knife |
Materials
| Name | Specification |
|---|---|
| Flexible Foam Repair 3M™ 08463, LORD Fusor® 121 |
- |
Removal
NOTE: Removal steps in this procedure may contain installation details.
NOTE: RH shown, LH similar.
-
Remove the fender splash shield.
Refer to: Fender Splash Shield (501-02 Front End Body Panels, Removal and Installation).
-
Remove the cowl panel grille assembly.
Refer to: Cowl Panel Grille (501-02 Front End Body Panels, Removal and Installation).
-
Remove the retainers and the fender flange finisher.
.jpg) |
-
Remove the headlamp assembly.
Refer to: Headlamp Assembly (417-01 Exterior Lighting, Removal and Installation).
-
Open the front door.
.jpg) |
-
Remove the bolt.
Torque: 44 lb.in (5 Nm)
.jpg) |
-
Close the door.
.jpg) |
-
Remove the bolt.
Torque: 97 lb.in (11 Nm)
.jpg) |
-
Remove the bolts.
Torque: 97 lb.in (11 Nm)
.jpg) |
-
NOTE: Follow the unique installation step when installing the fender.
Using a knife, cut the foam sealant between the fender and the body.
Use the General Equipment: Knife
.jpg) |
-
Remove the bolts.
Torque: 97 lb.in (11 Nm)
.jpg) |
-
Remove the fender.
.jpg) |
-
Remove any excess debris left on the body.
.jpg) |
Installation
-
To install, reverse the removal procedure.
-
Before installation of the fender, apply a continuous
stream of Fusor® 121 material along the entire span of the baffle-body
attachment area.
Material: Flexible Foam Repair / 3M™ 08463, LORD Fusor® 121
.jpg) |
 Removal and Installation - Engine Rear Undershield
Removal
NOTE:
Removal steps in this procedure may contain installation details.
Remove the Engine front undershield.
Refer to: Engine Front Undershield (501-02 Front End Body Panels, Re..
 Removal and Installation - Fender Splash Shield
Removal
NOTE:
Removal steps in this procedure may contain installation details.
NOTE:
LH side shown, RH side similar.
Remove the wheel and tire...
Other information:
Ford Explorer 2020-2026 Service Manual: Removal and Installation - Front Seat Cushion Cover
Removal Passenger seat Remove the OCS. Refer to: Occupant Classification System (OCS) Sensor - Vehicles Without: Multi-Contour Seats (501-20B Supplemental Restraint System, Removal and Installation). Refer to: Occupant Classification System (OCS) Sensor - Vehicles With: Multi-Contour Seats (501-20B Supplemental Restraint System, Removal and Installation)...
Ford Explorer 2020-2026 Service Manual: Diagnosis and Testing - Diagnostic Strategy
Overview The diagnostic process for each transmission concern will vary depending on the symptoms and condition of the vehicle. The diagnostic process below is an efficient method to collect as much data as possible about the concern before performing a repair or removing the transmission from the vehicle for teardown and further inspection...
Categories
- Manuals Home
- 6th Generation Explorer Owners Manual
- 6th Generation Explorer Service Manual
- Electric Parking Brake
- Fuel Filler Funnel Location & Running Out of Fuel
- Automatic Transmission
- New on site
- Most important about car
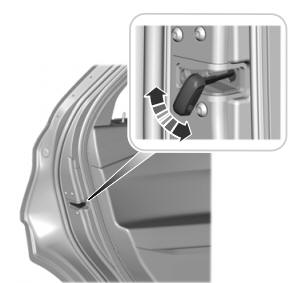
Child Safety Locks
When these locks are set, you cannot open the rear doors from the inside.

A child safety lock is on the rear edge of each rear door. You must set the child safety lock separately on each door.
Left-Hand Side
Copyright © 2026 www.foexplorer.com
