Ford Explorer: Accessory Drive - 2.3L EcoBoost (201kW/273PS) / Removal and Installation - Accessory Drive Belt Idler Pulley
Removal
NOTICE: Under no circumstances should the accessory drive belt, tensioner or pulleys be lubricated as potential damage to the belt material and tensioner damping mechanism will occur. Do not apply any fluids or belt dressing to the accessory drive belt or pulleys.
1win aviator app downloadNOTE: Removal steps in this procedure may contain installation details.
-
Refer to: Health and Safety Precautions (100-00 General Information, Description and Operation).
-
NOTICE: Do not pull the engine apperance cover forward or sideways to remove. failure to put straight upward on the underside of the cover at the attachment points may result in damage to the cover or engine components.
Remove the nuts and the engine appearance cover.
Torque: 89 lb.in (10 Nm)
.jpg) |
-
Remove the clamp and position aside the CAC tube.
Torque: 48 lb.in (5.4 Nm)
.jpg) |
-
Remove the bolts (Enhanced Hexalobular or TORX PLUS ®
Acument Intellectual Properties, LLC as the owner) and the shield.
Torque: 18 lb.ft (25 Nm)
.jpg) |
-
-
Rotate the accessory drive belt tensioner counter clockwise.
-
Position the accessory dive belt aside.
-
Rotate the accessory drive belt tensioner counter clockwise.
.jpg) |
- Torque: 93 lb.in (10.5 Nm)
.jpg) |
Installation
-
To install, reverse the removal procedure.
 Removal and Installation - Accessory Drive Belt
Removal
NOTICE:
Under no circumstances should the accessory drive belt,
tensioner or pulleys be lubricated as potential damage to the belt
material and tensioner damping mechanism will occur...
 Removal and Installation - Accessory Drive Belt Tensioner
Removal
NOTICE:
Under no circumstances should the accessory drive belt,
tensioner or pulleys be lubricated as potential damage to the belt
material and tensioner damping mechanism will occur...
Other information:
Ford Explorer 2020-2025 Service Manual: Diagnosis and Testing - Noise, Vibration and Harshness (NVH)
Special Tool(s) Vehicle Communication & Measurement Module (VCMM™) Base Kit 164-R9822 / 164-R9823 EngineEAR107-R2100Chassis EarsJSP97170 Squeak And Rattle Kit164-R4900 Ultrasonic Leak Detector134-R0135 Diagnostic Theory The shortest route to an accurate diagnosis results from: System knowledge, including comparison with a kn..
Ford Explorer 2020-2025 Service Manual: Description and Operation - Second Row Seats - Overview
Overview Heated Seats If equipped with the heated seat system, the rear seat cushion and backrest can be heated at one of two levels on demand. The components of the rear heated seat system include: Seat cushion heater mat (LH/ RH) Seat backrest heater mat (LH/ RH) Heated seat module (attached to the underside of the RH second row seat cushion frame) Heated seat switches (..
Categories
- Manuals Home
- 6th Generation Explorer Owners Manual
- 6th Generation Explorer Service Manual
- Electric Parking Brake
- Interior Trim and Ornamentation
- Traction Control
- New on site
- Most important about car
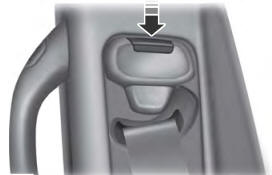
Seatbelt Height Adjustment
WARNING: Position the seatbelt height adjuster so that the seatbelt rests across the middle of your shoulder. Failure to adjust the seatbelt correctly could reduce its effectiveness and increase the risk of injury in a crash.

