Kia Picanto: Specifications / Tyres and wheels
For Europe
The following specifications cover the listed tyre and wheel combinations for European vehicles. Match the tyre size to the appropriate row, then read the front and rear inflation pressures for the relevant load condition. The table also gives the tyre load index, speed symbol and wheel nut tightening torque.
| Item | Tyre size | Wheel size | Load capacity | Speed capacity | Inflation pressure, kPa (psi, bar) | Wheel nut tightening torque, kgf·m (lbf·ft, N·m) | |||||
|---|---|---|---|---|---|---|---|---|---|---|---|
| Normal load | Maximum load | ||||||||||
| Load index (LI) | kg | Speed symbol (SS) | km/h | Front | Rear | Front | Rear | ||||
| Full-size tyre | 175/65R14 | 5.5J × 14 | 86 | 530 | T | 190 | 235 (34, 2.35) | 215 (31, 2.15) | 235 (34, 2.35) | 215 (31, 2.15) | 11–13 (79–94, 107–127) |
| 185/55R15 | 6.0J × 15 | 86 | 530 | H | 210 | 230 (33, 2.3) | 210 (30, 2.1) | 230 (33, 2.3) | 250 (36, 2.5) | ||
| 195/45R16 | 6.5J × 16 | 84 | 500 | V | 240 | 230 (33, 2.3) | 210 (30, 2.1) | 230 (33, 2.3) | 250 (36, 2.5) | ||
| Compact spare tyre on steel wheel, if equipped | T115/70D15 | 3.5J × 15 | 90 | 600 | M | 130 | 420 (60, 4.2) | ||||
LI — Load Index: The tyre’s load index is listed alongside its corresponding load capacity in kilograms.
SS — Speed Symbol: The letter identifies the tyre’s speed rating, with the corresponding speed capacity shown in kilometres per hour.
If equipped: The compact spare tyre specifications apply only to vehicles supplied with this spare wheel and tyre combination.
Except Europe
The following tyre and wheel specifications apply to Kia Picanto versions supplied outside Europe. Select the row that matches the tyre size fitted to your vehicle, then use the front and rear inflation pressures specified for the relevant load condition. Load ratings, speed ratings and wheel nut tightening torque are included in the same table for reference.
| Item | Tyre size | Wheel size | Load capacity | Speed capacity | Inflation pressure, kPa (psi, bar) | Wheel nut tightening torque, kgf·m (lbf·ft, N·m) | |||||
|---|---|---|---|---|---|---|---|---|---|---|---|
| Normal load | Maximum load | ||||||||||
| Load index (LI) | kg | Speed symbol (SS) | km/h | Front | Rear | Front | Rear | ||||
| Full-size tyre | 175/65R14 | 5.5J × 14 | 86 | 530 | T | 190 | 230 (33, 2.3) | 210 (30, 2.1) | 230 (33, 2.3) | 250 (36, 2.5) | 11–13 (79–94, 107–127) |
| 185/55R15 | 6.0J × 15 | 86 | 530 | H | 210 | 230 (33, 2.3) | 210 (30, 2.1) | 230 (33, 2.3) | 250 (36, 2.5) | ||
| 195/45R16 | 6.5J × 16 | 84 | 500 | V | 240 | 230 (33, 2.3) | 210 (30, 2.1) | 230 (33, 2.3) | 250 (36, 2.5) | ||
| Compact spare tyre on steel wheel, if equipped | T115/70D15 | 3.5J × 15 | 90 | 600 | M | 130 | 420 (60, 4.2) | ||||
LI — Load Index: The numerical tyre load rating, shown alongside the corresponding load capacity in kilograms.
SS — Speed Symbol: The letter identifying the tyre’s speed rating, with the corresponding speed capacity listed in kilometres per hour.
If equipped: The compact spare tyre specifications apply only when this wheel and tyre combination is supplied with the vehicle.
NOTE
-
When replacing tyres, Kia recommends choosing the same specification as the tyres originally supplied with the vehicle. A different tyre specification can alter driving performance, so use the original equipment specification as the reference when selecting replacements for your Kia Picanto.
-
Atmospheric pressure naturally decreases as altitude increases. When driving at higher elevations, check the tyre pressures and add air where necessary to account for this change.
The specified additional tyre pressure allowance is 1.5 psi for each kilometre of altitude above sea level. This figure refers to elevation, rather than the distance travelled.
CAUTION
Replacement tyres must be the same size as those originally fitted to the vehicle. Match the complete tyre size designation when selecting a replacement.
Fitting tyres of a different size can damage related components or cause them to operate incorrectly. The specified tyre size therefore matters to the operation of the vehicle as well as to wheel fitment.
 Bulb wattage
Use the table below to identify the specified wattage and bulb type for each lighting position. Some lamps are
available in either a conventional bulb or LED version; select the entry that corres..
 Weight/volume. Air conditioning system
Weight/volume
The tables below list gross vehicle weight and luggage capacity for the Kia Picanto specifications shown. Choose the
table for the relevant market, seating configuration, engine and..
Other information:
Ford Explorer 2020-2026 Owners Manual: Reverse Braking Assist Precautions
WARNING: You are responsible for controlling your vehicle at all times. The system is designed to be an aid and does not relieve you of your responsibility to drive with due care and attention. Failure to follow this instruction could result in the loss of control of your vehicle, personal injury or death...
Ford Explorer 2020-2026 Service Manual: Removal and Installation - Turbine Shaft Speed (TSS) Sensor
Removal Remove the main control valve body. Refer to: Main Control Valve Body (307-01B Automatic Transmission - 10-Speed Automatic Transmission – 10R80, Removal and Installation). Remove the TSS sensor. Slide the plastic lock to the unlocked position...
Categories
- Manuals Home
- 6th Generation Explorer Owners Manual
- 6th Generation Explorer Service Manual
- General Service Information
- Description and Operation - Jacking and Lifting - Overview
- Auxiliary Power Points
- New on site
- Most important about car
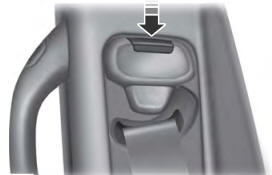
Seatbelt Height Adjustment
WARNING: Position the seatbelt height adjuster so that the seatbelt rests across the middle of your shoulder. Failure to adjust the seatbelt correctly could reduce its effectiveness and increase the risk of injury in a crash.