Ford Explorer: Police Equipment / Removal and Installation - Exterior Mirror Flashing Light Emitting Diode (LED) Lamps
Special Tool(s) / General Equipment
| Flat Headed Screw Driver |
Removal
NOTE: Removal steps in this procedure may contain installation details.
-
.jpg) WARNING:
Place a shop towel between the hands and the
exterior mirror glass for protection in case of glass breakage during
mirror service. Failure to follow this instruction may result in serious
personal injury.
WARNING:
Place a shop towel between the hands and the
exterior mirror glass for protection in case of glass breakage during
mirror service. Failure to follow this instruction may result in serious
personal injury.
NOTICE: Position the screwdriver using the service slot in the mirror glass backing plate to remove the mirror glass. Prying on the backing plate in other locations may damage the mirror glass.
NOTE: Typical application shown.
Remove the exterior mirror glass.
-
Position the exterior mirror glass fully in and up.
-
Using a flat blade screwdriver to release the tabs
starting at the lower outboard side of mirror and continuing around the
mirror until all the tabs are released.
Use the General Equipment: Flat Headed Screw Driver
-
NOTE: The number and location of the electrical connectors will vary based on mirror option content.
Disconnect the exterior mirror glass electrical connectors.
-
Position the exterior mirror glass fully in and up.
.jpg) |
-
Inspect the mirror glass stabilization springs, replace the mirror glass if damaged.
.jpg) |
-
Remove the screws, release the tab and remove the exterior mirror bezel.
.jpg) |
-
Disconnect the exterior mirror flashing light emitting
diode lamp electrical connector, release the tabs and remove the
exterior mirror cover and exterior mirror flashing light emitting diode
lamp.
.jpg) |
-
Remove the nuts and the exterior mirror flashing light emitting diode lamp from the exterior mirror cover.
.jpg) |
Installation
-
To install, reverse the removal procedure.
 General Procedures - Individual Flash Pattern Programming
Programming
All vehicles
WARNING:
Police Package warning lights are a
high-intensity Light-Emitting Diode (LED) type. Do not stare directly at
these lights, as doing so may cause..
 Removal and Installation - Flasher Switch Pad
Removal
NOTE:
Removal steps in this procedure may contain installation details.
NOTE:
Lighting and siren control module switch pad shown, lighting relay center switch pad similar...
Other information:
Ford Explorer 2020-2024 Service Manual: Description and Operation - Rear View Mirrors - System Operation and Component Description
System Operation System Diagram - Exterior, Power, Without Memory Item Description 1 Exterior mirror control switch 2 LH front door window control switch 3 LIN 4 MS-CAN 5 DDM 6 PDM 7 LH exterior mirror 8 RH exterior mirror Network Message Chart Module Network Inp..
Ford Explorer 2020-2024 Service Manual: Description and Operation - Battery and Battery Charging Health and Safety Precautions
WARNING: Batteries contain sulfuric acid and produce explosive gases. Work in a well-ventilated area. Do not allow the battery to come in contact with flames, sparks or burning substances. Avoid contact with skin, eyes or clothing. Shield eyes when working near the battery to protect against possible splashing of acid solution...
Categories
- Manuals Home
- 6th Generation Explorer Owners Manual
- 6th Generation Explorer Service Manual
- Traction Control
- General Procedures - Brake Service Mode Activation and Deactivation
- Fuel Filler Funnel Location & Running Out of Fuel
- New on site
- Most important about car
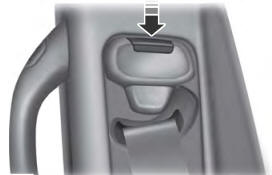
Seatbelt Height Adjustment
WARNING: Position the seatbelt height adjuster so that the seatbelt rests across the middle of your shoulder. Failure to adjust the seatbelt correctly could reduce its effectiveness and increase the risk of injury in a crash.

