Ford Explorer: Rear View Mirrors / Removal and Installation - Exterior Mirror
Special Tool(s) / General Equipment
| Flat Headed Screw Driver |
Removal
NOTE: Removal steps in this procedure may contain installation details.
Exterior mirror assembly
-
Remove the front door interior trim panel.
Refer to: Front Door Trim Panel (501-05 Interior Trim and Ornamentation, Removal and Installation).
-
Remove the trim pins and the front door upper trim panel.
.jpg) |
-
-
Disconnect the exterior mirror electrical connector.
-
If equipped.
Disconnect the camera electrical connector.
-
Disconnect the exterior mirror electrical connector.
.jpg) |
-
Remove the bolts and the exterior mirror assembly.
.jpg) |
Exterior mirror glass
.jpg) WARNING:
Place a shop towel between the hands and the exterior
mirror glass for protection in case of glass breakage during mirror
service. Failure to follow this instruction may result in serious
personal injury.
WARNING:
Place a shop towel between the hands and the exterior
mirror glass for protection in case of glass breakage during mirror
service. Failure to follow this instruction may result in serious
personal injury.
NOTICE: Position the screwdriver using the service slot in the mirror glass backing plate to remove the mirror glass. Prying on the backing plate in other locations may damage the mirror glass.
-
Remove the exterior mirror glass.
-
Position the exterior mirror glass fully in and up.
-
Using a flat blade screwdriver to release the
tabs starting at the lower outboard side of mirror and continuing around
the mirror until all the tabs are released.
Use the General Equipment: Flat Headed Screw Driver
-
NOTE: The number and location of the electrical connectors will vary based on mirror option content.
Disconnect the exterior mirror glass electrical connectors.
-
Position the exterior mirror glass fully in and up.
.jpg) |
-
Inspect the mirror glass stabilization springs, replace the mirror glass if damaged.
.jpg) |
Exterior mirror motor
-
Remove the exterior mirror glass.
-
Remove the exterior mirror motor.
-
Remove the screws and position the exterior mirror motor aside.
-
Disconnect the exterior mirror motor electrical connectors.
-
Remove the screws and position the exterior mirror motor aside.
.jpg) |
Exterior mirror bezel
-
Remove the exterior mirror glass.
-
Remove the screws, release the tab and remove the exterior mirror bezel.
.jpg) |
Exterior mirror cover
-
Remove the exterior mirror motor.
-
Release the tabs and remove the exterior mirror cover.
.jpg) |
Mirror mounted turn signal
-
Remove the exterior mirror cover.
-
Disconnect the exterior mirror mounted turn signal electrical connector and release the tab.
.jpg) |
-
Release the tabs and remove the exterior mirror mounted turn signal.
.jpg) |
Puddle lamp
-
Using a screwdriver, release the tab and position the puddle lamp down.
Use the General Equipment: Flat Headed Screw Driver
.jpg) |
-
Disconnect the electrical connectors and remove the puddle lamp.
Use the General Equipment: Flat Headed Screw Driver
.jpg) |
Puddle lamp with logo
-
Using a screwdriver, release the tab and position the puddle lamp down.
Use the General Equipment: Flat Headed Screw Driver
.jpg) |
-
Disconnect the electrical connectors and remove the puddle lamp.
Use the General Equipment: Flat Headed Screw Driver
.jpg) |
Exterior mirror side parking aid camera
-
Remove the exterior mirror bezel.
-
Remove the exterior mirror side parking aid camera.
-
Remove the screws.
-
Disconnect the camera electrical connector.
-
Remove the screws.
.jpg) |
Installation
Exterior mirror assembly
-
To install, reverse the removal procedure.
-
Tighten the exterior mirror assembly bolts in the sequence shown.
Torque: 80 lb.in (9 Nm)
.jpg) |
Vehicles equipped with 360° cameras only.
-
NOTE: Carry out the following step if installing a new front camera.
Initialize the camera.
Refer to: Parking Aid Camera Initialization (413-13B Parking Aid - Vehicles With: Parking Aid Camera, General Procedures).
-
NOTE: Carry out the following steps only if a mirror assembly was removed.
Align the 360° cameras.
Refer to: 360 Degree View Camera Alignment (413-13B Parking Aid - Vehicles With: Parking Aid Camera, General Procedures).
 General Procedures - Power Mirrors Synchronization
Synchronization
NOTE:
The power folding mirrors may need to be synchronized any
time the mirrors are folded or unfolded without using the folding
switch, or if a new power folding mirror is insta..
 Removal and Installation - Interior Rear View Mirror
Special Tool(s) /
General Equipment
501-025Installer, Rear View Mirror
501-D118A
(501-D118)
Mirror Remover
Removal
NOTE:
Removal steps in this procedure may contain installati..
Other information:
Ford Explorer 2020-2026 Service Manual: Removal and Installation - Transmission - 3.3L Duratec-V6
Special Tool(s) / General Equipment 307-346 (T97T-7902-A) Retainer, Torque ConverterTKIT-1998-LM (NavigatoR)TKIT-1997-F/FLM/LT Magnetic Socket Transmission Jack Wooden Block Materials Name Specification Motorcraft® Multi-Purpose Grease SprayXL-5-A ESB-M1C93-B Motorcraft® MERCON® ULV Automatic Transmission FluidXT-12-QULV WSS-M2C949-A, MERCON®..
Ford Explorer 2020-2026 Service Manual: Description and Operation - Seatbelt Systems - System Operation and Component Description
System Operation Emergency Locking Retractor (ELR) All retractors have an Emergency Locking Retractor (ELR) mode, which is a vehicle-sensitive feature designed to activate and lock the seatbelt webbing during hard braking, cornering, or an impact of approximately 24 km/h (15 mph)...
Categories
- Manuals Home
- 6th Generation Explorer Owners Manual
- 6th Generation Explorer Service Manual
- Removal and Installation - All-Wheel Drive (AWD) Module
- Body and Paint
- Electric Parking Brake
- New on site
- Most important about car
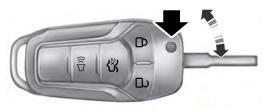
Integrated Keyhead Transmitter (If Equipped)
Use the key blade to start your vehicle and unlock or lock the driver door from outside your vehicle. The integrated keyhead transmitter functions as a programmed ignition key that operates all the locks and starts your vehicle, as well as a remote control.