Ford Explorer: Second Row Seats / Removal and Installation - Second Row Single Seat Cushion Cover - Vehicles With: Second Row Captain Chairs
Special Tool(s) / General Equipment
| Interior Trim Remover |
Removal
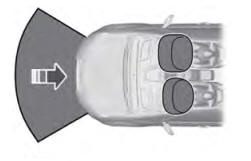
NOTE: LH (left hand) seat shown, RH (right hand) seat similar.
-
Remove the second row seat.
Refer to: Second Row Seat - Vehicles With: Second Row Captain Chairs (501-10B Second Row Seats, Removal and Installation).
-
Remove the second row seat center valance.
-
Release the retainer.
-
Release the retainer.
-
Release the retainer.
.jpg) |
-
Remove the second row seat inboard side shield.
-
Remove the screw.
-
Detach the retainers.
Use the General Equipment: Interior Trim Remover
-
Lift the side shield and pull outward.
-
Lift the side shield and pull outward.
-
Push the side shield forward.
-
Remove the screw.
.jpg) |
-
-
Remove the second row seat recline handle retaining clip.
-
Remove the second row seat recline handle.
-
Remove the second row seat recline handle retaining clip.
.jpg) |
-
Remove the second row seat outboard side shield.
-
Remove the screw.
-
Detach the retainers.
Use the General Equipment: Interior Trim Remover
-
Lift the side shield and pull outward.
-
Lift the side shield and pull outward.
-
Push the side shield forward.
-
Remove the screw.
.jpg) |
-
If equipped.
Disconnect the second row single seat cushion heater mat electrical connector and release the retainers.
.jpg) |
-
-
Release the second row single seat cushion cover hook-and-loop retainer.
-
Detach the second row single seat cushion cover J-clips.
-
Release the second row single seat cushion cover hook-and-loop retainer.
.jpg) |
-
-
If equipped.
Release the second row single seat cushion blower motor vent bag retaining clips.
-
Remove the second row single seat cushion cover and foam.
-
If equipped.
.jpg) |
-
NOTICE: Use care when separating the seat cushion trim cover from the hook-and-loop strips or the hook-and-loop strips may be torn from the seat cushion foam.
NOTICE: Use care when separating the seat cushion trim cover from the hook-and arrow or the hook may be torn from the seat cushion foam.
NOTE: This step is only necessary when installing a new component.
Remove the second row single seat cushion cover.
-
Invert the cover.
-
Release the hook-and-loop strips.
-
Release the hook-and-arrows.
-
Invert the cover.
.jpg) |
Installation
-
To install, reverse the removal procedure.
 Removal and Installation - Second Row Single Seat Cushion Cover
Special Tool(s) /
General Equipment
Interior Trim Remover
Removal
NOTE:
LH (left hand) seat shown, RH (right hand) seat similar.
NOTE:
Base vehicle shown, police vehicle similar...
 Removal and Installation - Second Row Single Seat Easy Entry Seat Fold Switch
Removal
NOTE:
Removal steps in this procedure may include installation details.
Release the retainers and remove the second row single seat easy entry seat fold switch bezel...
Other information:
Ford Explorer 2020-2024 Service Manual: Diagnosis and Testing - Information and Entertainment System - Vehicles Without: SYNC 3
Diagnostic Trouble Code (DTC) Chart Diagnostics in this manual assume a certain skill level and knowledge of Ford-specific diagnostic practices. REFER to: Diagnostic Methods (100-00 General Information, Description and Operation). Diagnostic Trouble Code Chart Module DTC Description Action ACM B108E:1..
Ford Explorer 2020-2024 Service Manual: Removal and Installation - Running Board
Removal NOTE: Removal steps in this procedure may contain installation details. NOTE: LH side shown, RH side similar. NOTE: This step requires the aid of another technician. Remove the bolts and the running board assembly. Torque: 177 lb...
Categories
- Manuals Home
- 6th Generation Explorer Owners Manual
- 6th Generation Explorer Service Manual
- Engine - 2.3L EcoBoost (201kW/273PS)
- Removal and Installation - All-Wheel Drive (AWD) Module
- General Procedures - Rear Camber Adjustment
- New on site
- Most important about car
Driver and Passenger Airbags
WARNING: Do not place your arms on the airbag cover or through the steering wheel. Failure to follow this instruction could result in personal injury.
WARNING: Keep the areas in front of the airbags free from obstruction. Do not affix anything to or over the airbag covers. Objects could become projectiles during airbag deployment or in a sudden stop. Failure to follow this instruction could result in personal injury or death.
WARNING: Airbags can kill or injure a child in a child restraint. Never place a rear-facing child restraint in front of an active airbag. If you must use a forward-facing child restraint in the front seat, move the seat upon which the child restraint is installed all the way back.